
No matter how safely you surf the internet, your Internet Service Provider can still monitor what you are doing right now. However, connecting your PC to a VPN can help you work more securely. Furthermore, you can easily access any website that is restricted in your area by using a VPN on your Windows 10.
But what exactly is a VPN? Let’s take a look at VPNs.
What is VPN
When you connect your device to the internet, your ISP (Internet Service Provider) assigns you a public IP address. This means that any website or app can track your location and activities. This is where a VPN can help.

A VPN (Virtual Private Network) lets you establish an encrypted internet connection over another network. It extends a private network across the public network, allowing users to securely transfer data as encrypted data. VPN services can be used to securely access applications and websites.
That’s it, this is how VPNs work. Now there must be a question hanging around in your mind—how you can use a VPN?
Well, keep reading this article as we’ve mentioned a step-by-step guide to create and connect to VPN in Windows 10.
►Read More:
How to connect VPN in Windows 10
In Windows 10, there are two methods for connecting to a VPN. First, you can use VPN software to automatically connect your PC to a VPN with just a few clicks. Second, you can manually connect to a VPN using Windows 10’s built-in VPN feature.

Method 1: Connect VPN using softwares
If you don’t want to go through several steps to connect to a VPN, VPN software is a much better option. It only takes a few steps to set it up and a single click to connect to the VPN automatically.
In this example, we used ‘Hide.me VPN’ to connect a Windows 10 PC to a VPN service.
To connect a VPN to Windows 10 using the Hide.me VPN, follow these steps:
- Download the Hide.me VPN from the official website.
- Install and launch the Hide.me VPN.
- Choose the free plan.
- Click the ‘Enable VPN‘.
- Click the ‘Connect to VPN‘.
It will now automatically connect the VPN to your PC in less than a second.
Choosing a VPN service can be tricky because there are many services available on the internet that claim to protect your browsing but actually track the user’s activities.
Here are some safe VPN services that you can use without any hesitation:
Free VPN Softwares:
- Hotspot Shield
- TunnelBear
- ProtonVPN Free
- Windscribe
- Speedify
- Hide.me
Paid VPN Softwares:
- ExpressVPN
- Surfshark VPN
- Nord VPN
Method 2: Connect VPN manually
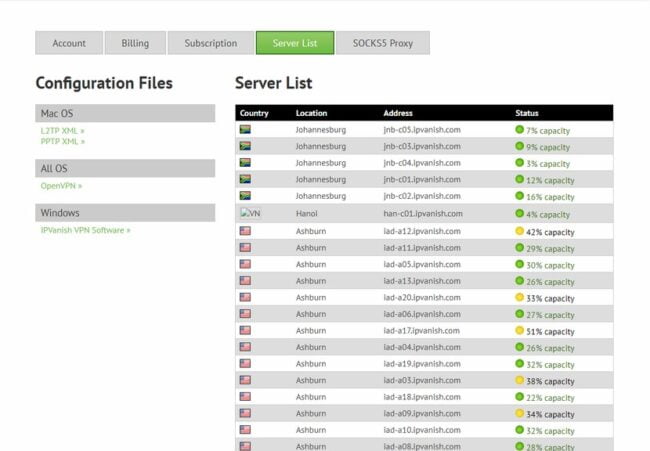
To begin, you must sign up for a VPN service such as OpenVPN, NordVPN, or another. It is necessary to use online VPN services because you must choose the best servers and protocols. PPTP, L2TP/IPSec, SSTP, and OpenVPN are the four most common. It may appear difficult but setting it up will only take 10-20 minutes.
Once you’ve gathered all of the necessary information, you can proceed to the steps for creating a VPN profile in Windows 10:
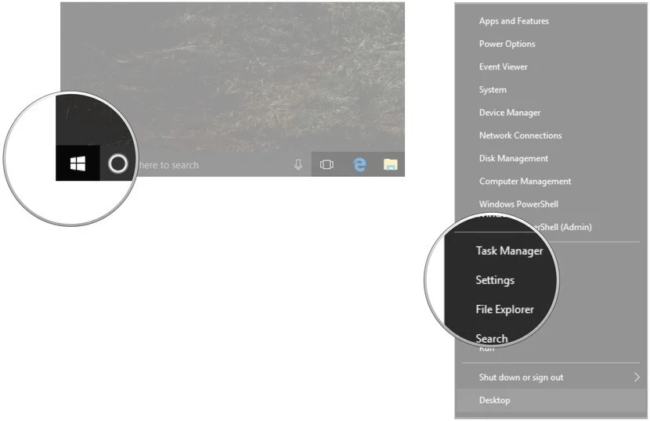
- Right-click the ‘Start button’.
- Click ‘Settings‘.

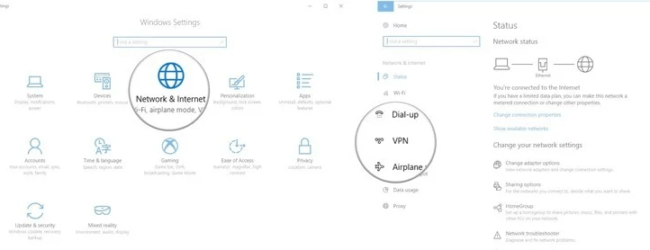
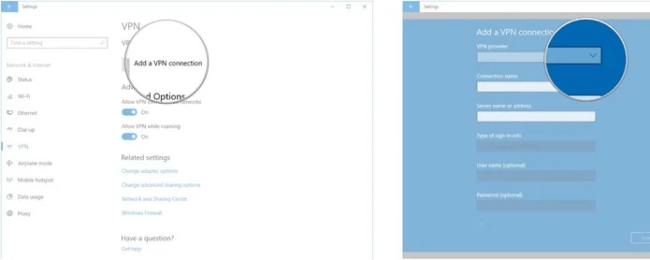
(Image credit: Windows Central) - Click ‘Network & Internet‘.
- Click ‘VPN‘.

(Image credit: Windows Central) - Click ‘Add a VPN connection‘.
- Click the dropdown menu below the VPN provider.

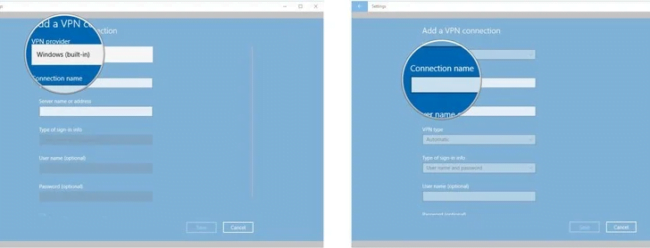
(Image credit: Windows Central) - Click ‘Windows (built-in)‘.
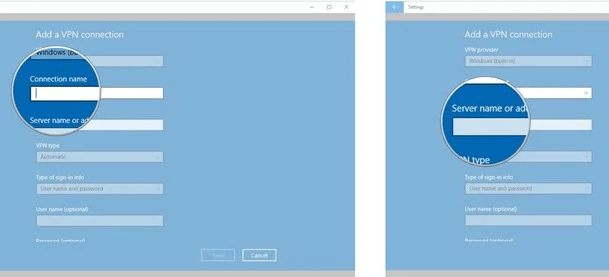
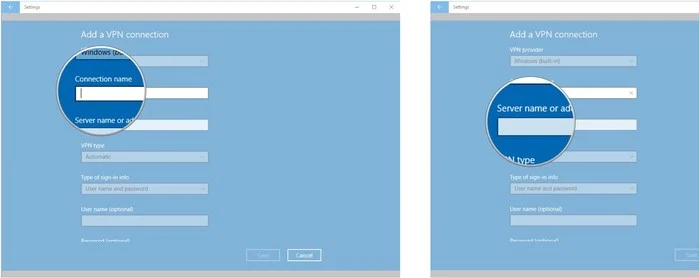
- Click the ‘Connection name‘ field.

(Image credit: Windows Central) - Type a name for the VPN connection.
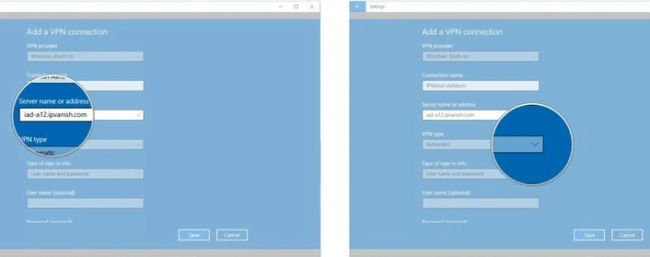
- Click the ‘Server name or address‘ field.

(Image credit: Windows Central) - Type the ‘server’s address‘ (Find it from your sign in VPN service).
- Click the ‘dropdown menu‘ below VPN type.

(Image credit: Windows Central) - Choose a ‘connection protocol‘.
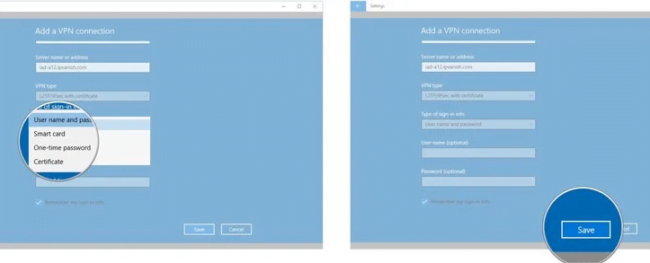
- Click the ‘dropdown menu‘ below the Type of sign-in info.

(Image credit: Windows Central) - Click a ‘Sign-in method‘ (This will be different as per your VPN provider).
- Click ‘Save‘.

(Image credit: Windows Central) - Click the ‘VPN‘ you just set up (It will now appear in the VPN list).
- Click ‘Connect‘.

(Image credit: Windows Central)
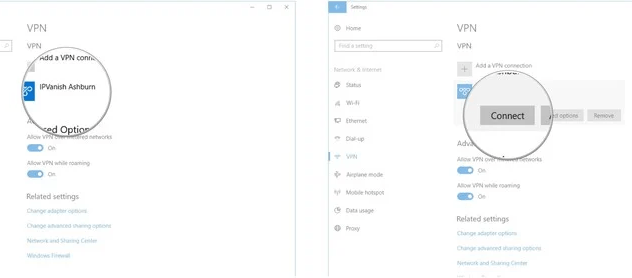
When a VPN connection is connected, the VPN connection name will show Connected beneath it. To check whether you’re connected to the VPN, click the Network icon in the far bottom right corner of the taskbar, then check whether the VPN connection says ‘Connected‘ or Not.
►Read More:
How to disconnect VPN on Windows 10
If you want to disconnect the VPN connection or remove the VPN connection’s server list, simply click on the Network icon in the bottom right corner of the taskbar. You will then see a list of all connections; find your VPN connection and click Disconnect.